
Here is the finished product so you know what you're building.
You'll need:
Wooden Blocks, or space fillers that can be used to both hole the terrarium up and prevent "plaster" from going to unwanted places.
A Terrarium, I think 20 Gallons is what I'm using but I don't know for sure.
A Lid, that should fit as well as possible. It should be solid and not a screen, lights help also.
Modeling Clay, both for making the chambers and to fill in holes in the lid.
3 in One Oil, normally used to lubricate saw blades. There are other brands of course, it's simply a light oil to detour ants away from the edge of the glass. Fluon is the official product you're supposed to use to keep insects inside their setup but it's darn expensive.
An Optional Floor Medium, I used Repti Bark sold in the lizard isle at most pet stores. It's basically large chunks of bark. You can use the colored sands they sell but my experience is that ants don't like walking on sand. Your experience may vary though. I like the bark because the ants will eventually "play" with it and bring some inside the nest to add walls and floors where they like.
And most importantly your choice of either Plaster of Paris, Ytong, Aerated Concrete, or Gypsum, aka Hydrostone. I use Plaster of Paris because it's by far the most widely available. From you local hobby store to the mega-mart hardware chain, chances are you don't need the internet to find Plaster of Paris.
Please Note! Measurements, preparation, safety hazards, and rate of causing cancer may vary! Read the labels! Plaster of Paris is safe to use but contains crystaline silica which can cause cancer. This means don't ingest it! Use gloves and or limit your contact with it, don't build a plaster setup every day, wear a safety mask and or don't breath in the dust when mixing or sanding. Don't mix it in anything you plan to later eat from. This is probably good advice for whatever medium you decide to use because they can all cause skin irritation and so on... Plaster of Paris is also nice because it gives off relatively low heat as it hardens. Some of the other products will actually produce steam as they dry!
This setup requires you to work the plaster as it hardens. You will need the use of "instruments." I suggest the following: a Pointed Stick, a few Large Cotton Balls, a Crumbled up Paper Towel, a Small Piece of Cardboard and possibly a length of plastic tube for blowing but I didn't find this useful that much.
So with all that out of the way let's begin.

Because we want the tunnels to be on the side of the glass, place the terrarium on it's side. Pick a spot about half way down the side (now closest to the table). With the modeling clay roll out an entrance tunnel. Note that the largest ants in North America can fit happily thorough a 1/2 inch tunnel, so they don't need to be that big.
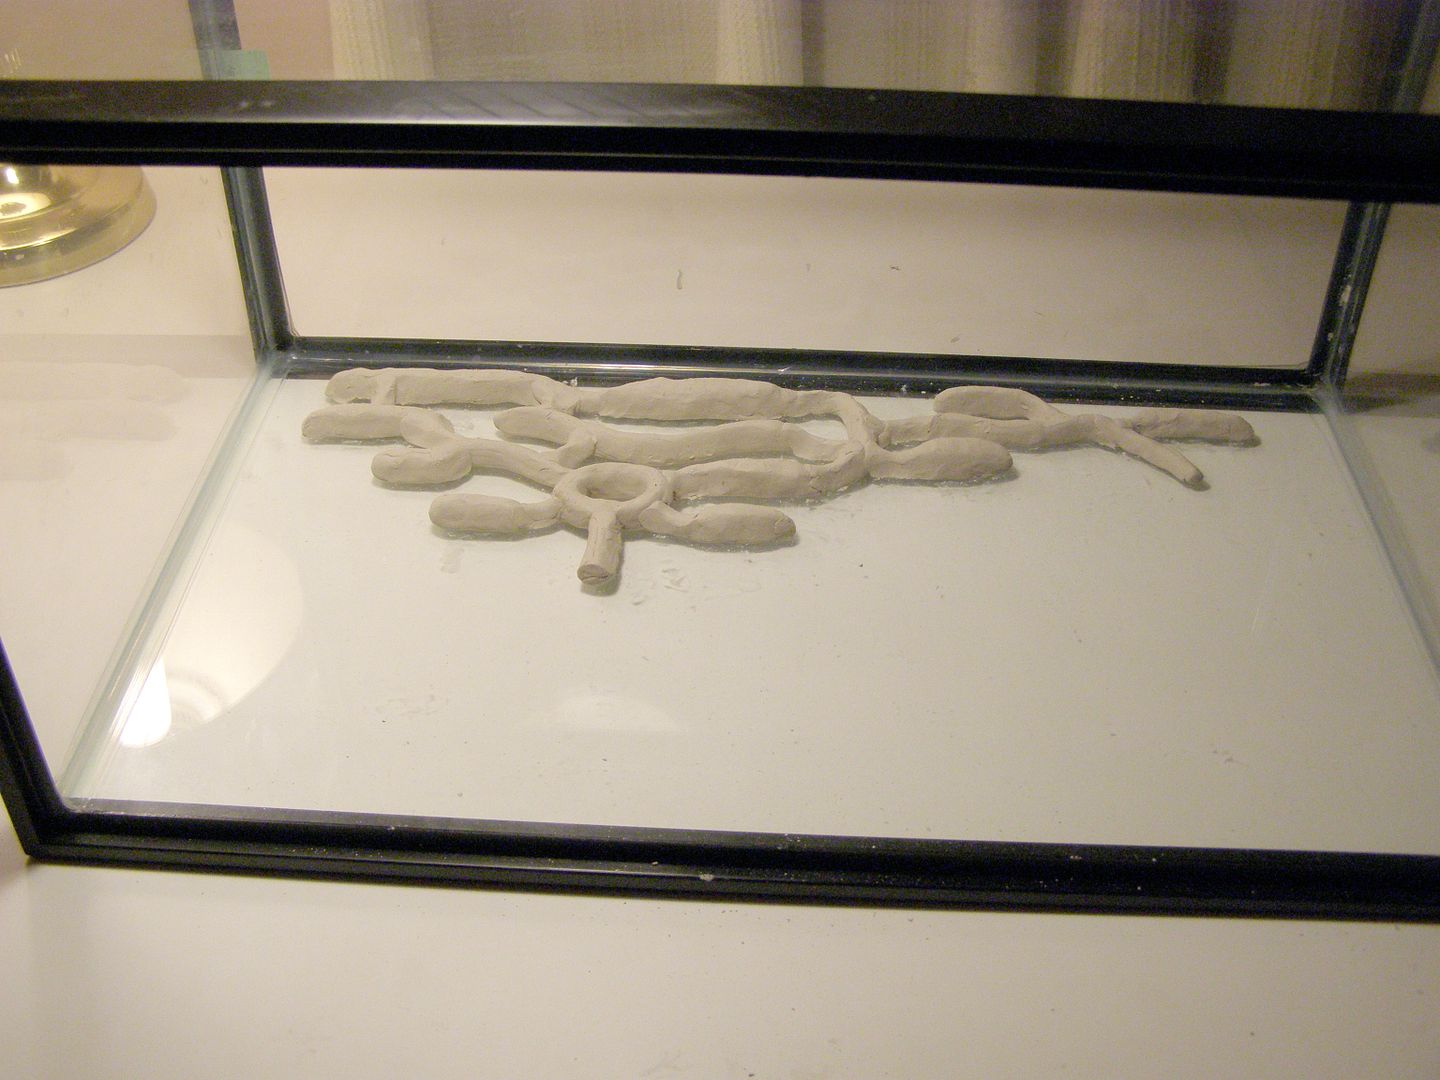
Continue building the nest. It's a good idea to start with hallways that flow to other parts of the nest before going back and adding galleries (rooms) to them.
To the right I've decided to add a second entrance. I've also decided I want the plaster to form an Ant Hill shape. This will require either a wall of modeling clay or some wooden blocks to hold back the plaster. If you don't want the Ant Hill effect it's fine to have it as a Wall instead. Had I gone with a Wall design the second entrance to the right would have to come up much farther.
When you're ready prop the tank at an angle on a wooden block, (a heavy book will also work.) If you're going for a simple Wall look then you're ready to mix and pour the plaster. If you're going for what I did and want an Ant Hill effect then you'll need to sway where the plaster goes as you pour. More wooden blocks at appropriate angles or building walls/dams out of modeling clay should be added.
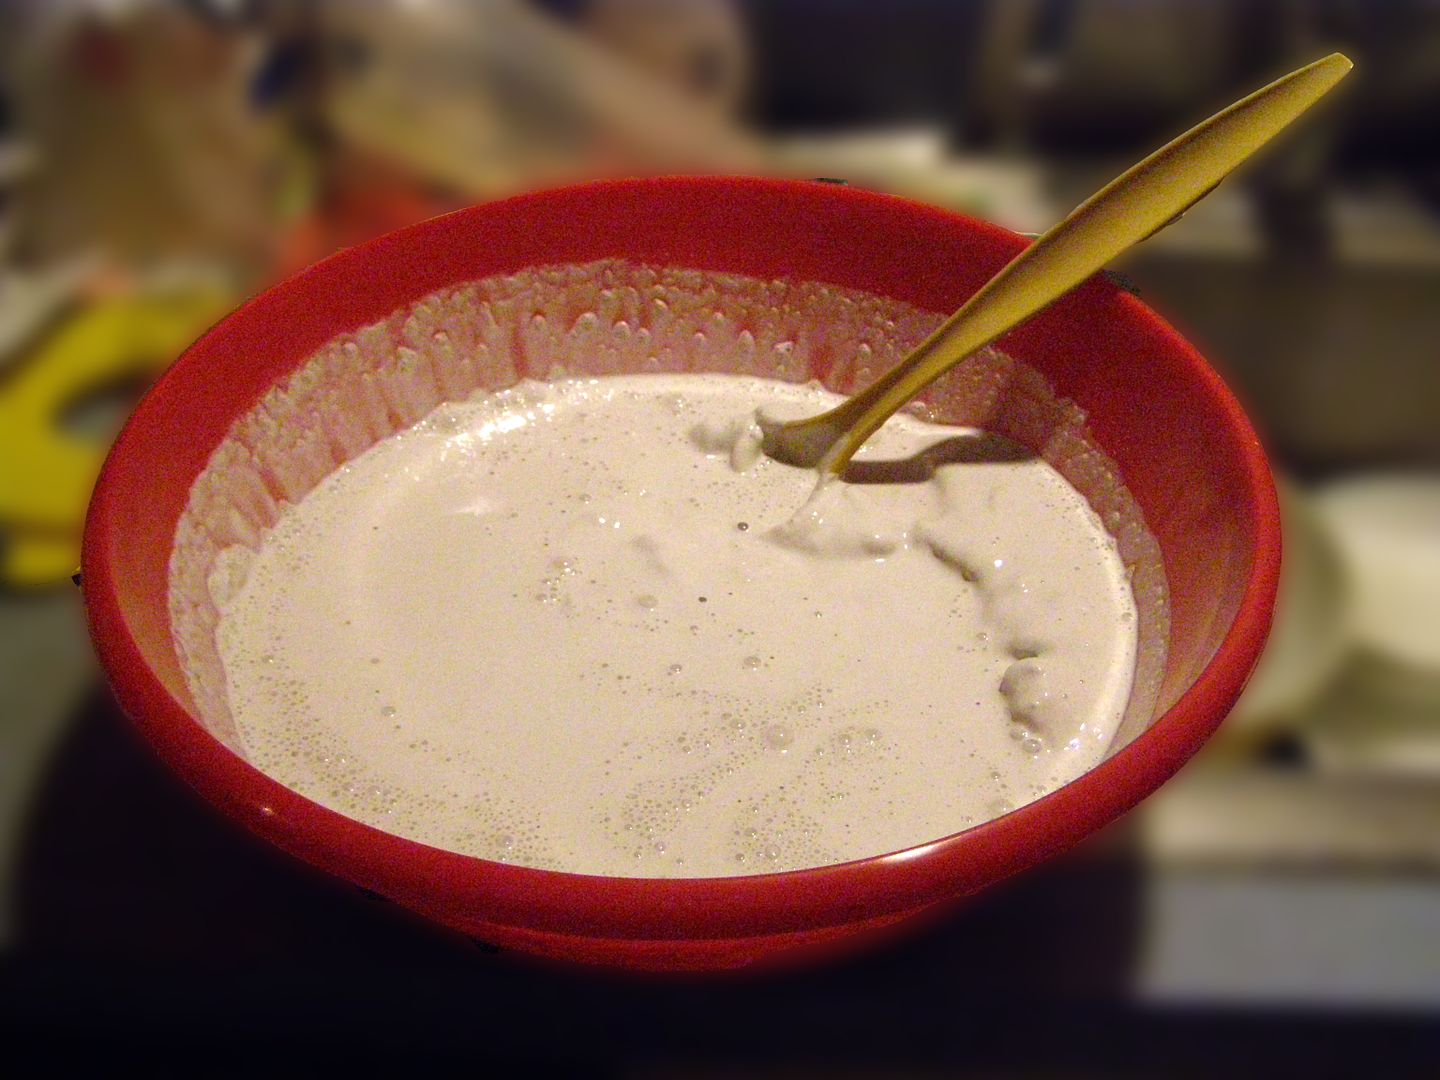
Plaster of Paris mixes at a 2:1 ratio. Meaning for ever 2 cups Plaster I have to mix in 1 cup water. If you're not using Plaster of Paris this ratio might be different. Consult directions.
Plaster of Paris should be mixed for at least 5 minutes. After 10 minutes it's started hardening and you need to get it in the Tank.
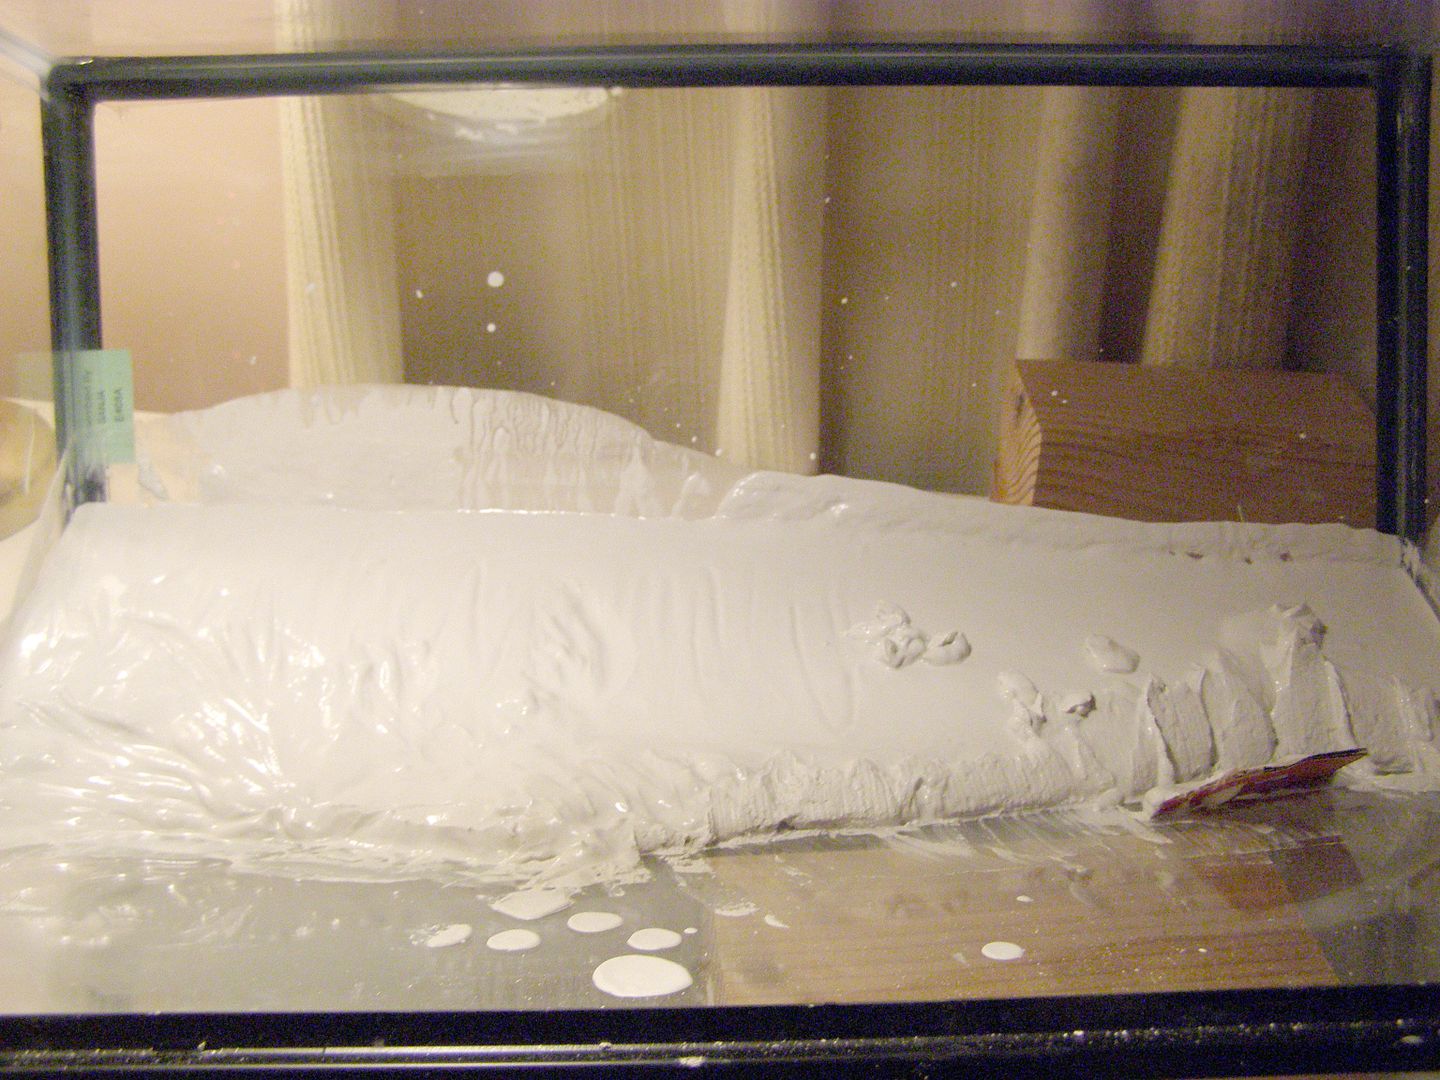
It's hard to tell from this photo but the Terrarium is tilted forward now and being held up by the wooden block under it (lower right). There were also wooden blocks in the tank to sway the plaster into it's current shape. The plaster was poured in here and allowed 10 minutes to set up.
After 10 minutes (give or take) you're ready to start shaping the plaster. It should be hard enough now that it's turning from a gooey slime to a paste. Add texture with piece of cardboard to push the plaster back as needed.
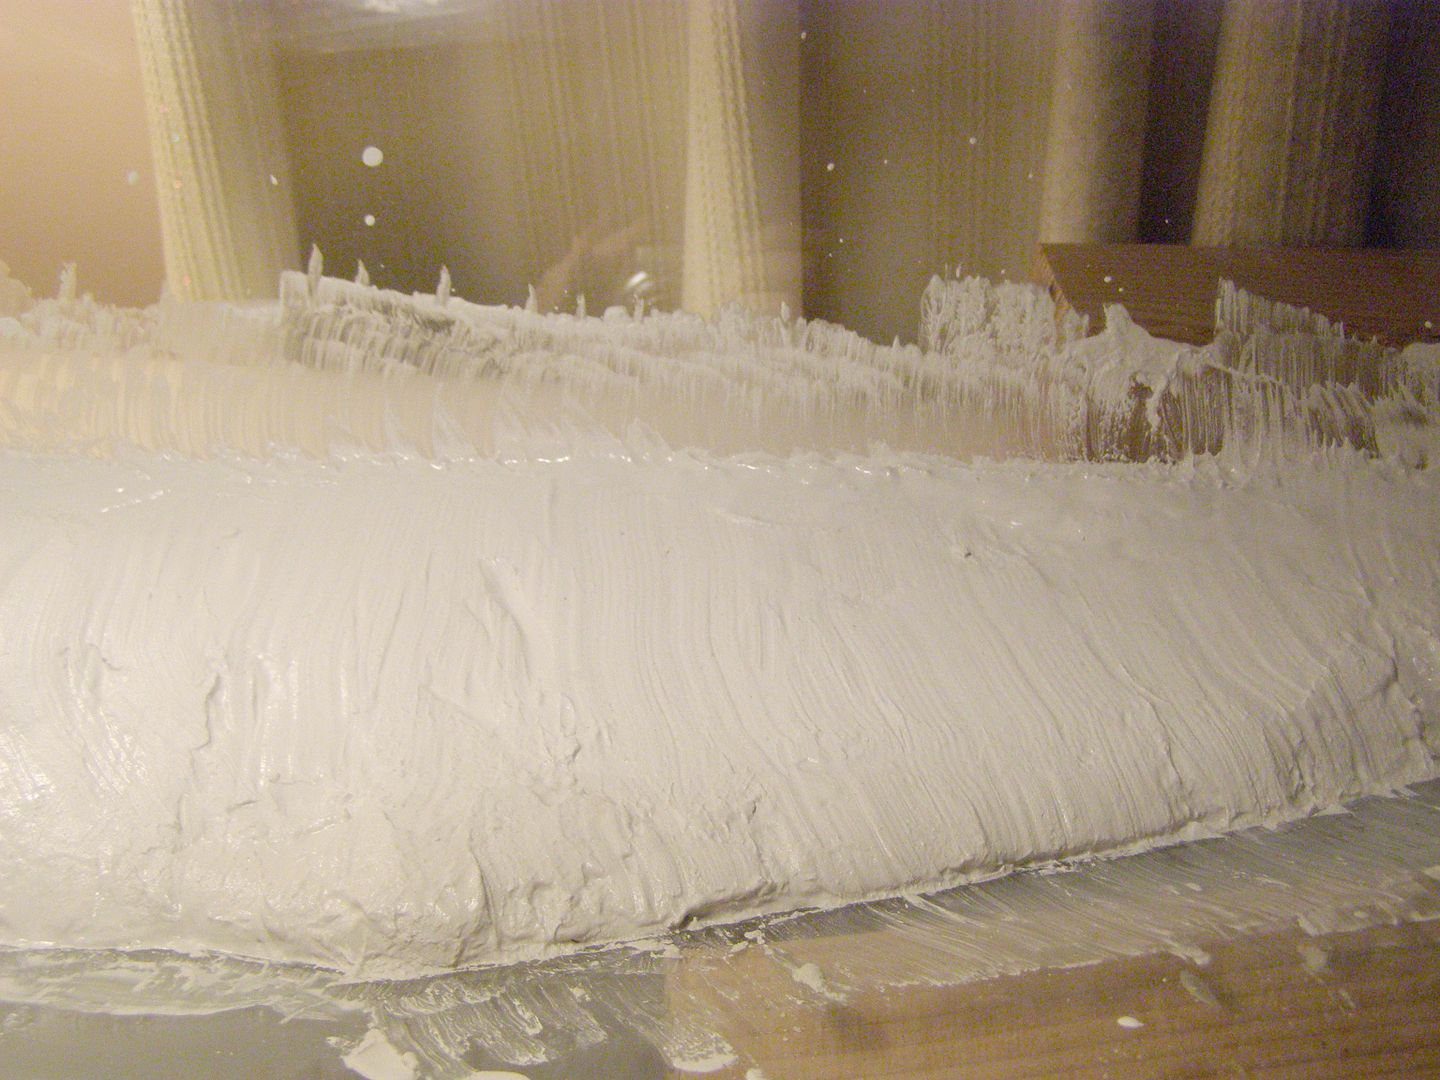
There is a line effect from the ridges in the cardboard that looks nice but we can do better.
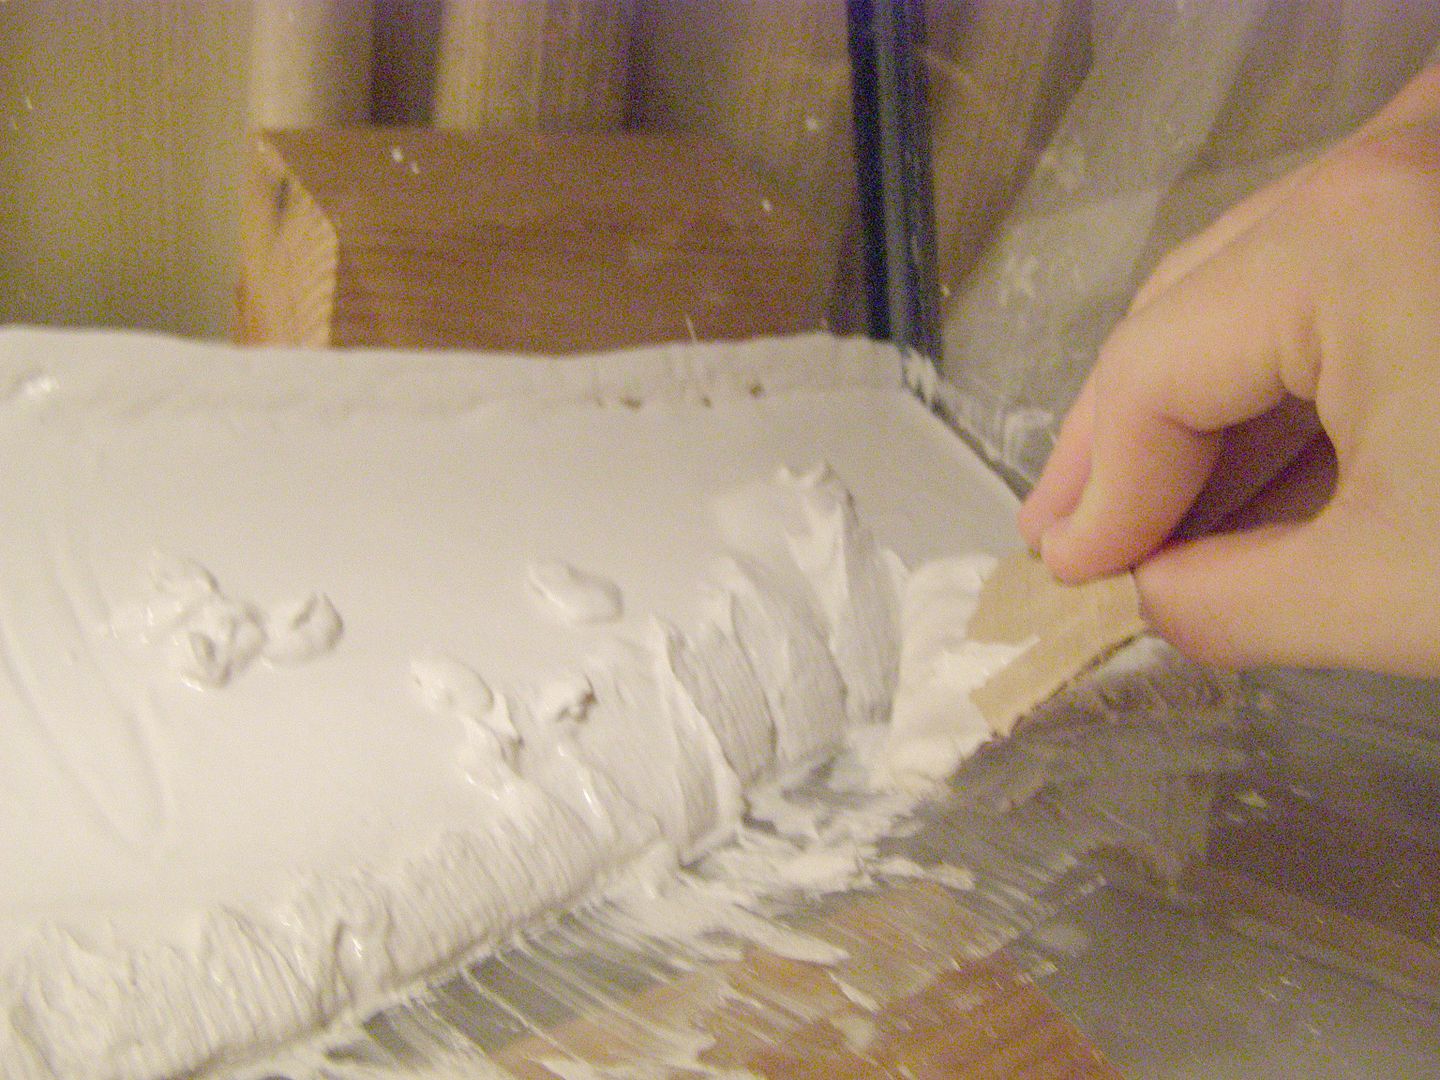
Dabbing with a large cotton ball or crumbled up paper towel will soften the lines and add a rock like texture. Feel free to clean up the glass too. If you don't you'll have tons of tiny flakes of plaster in your setup. It's best to work those in while they're still wet.
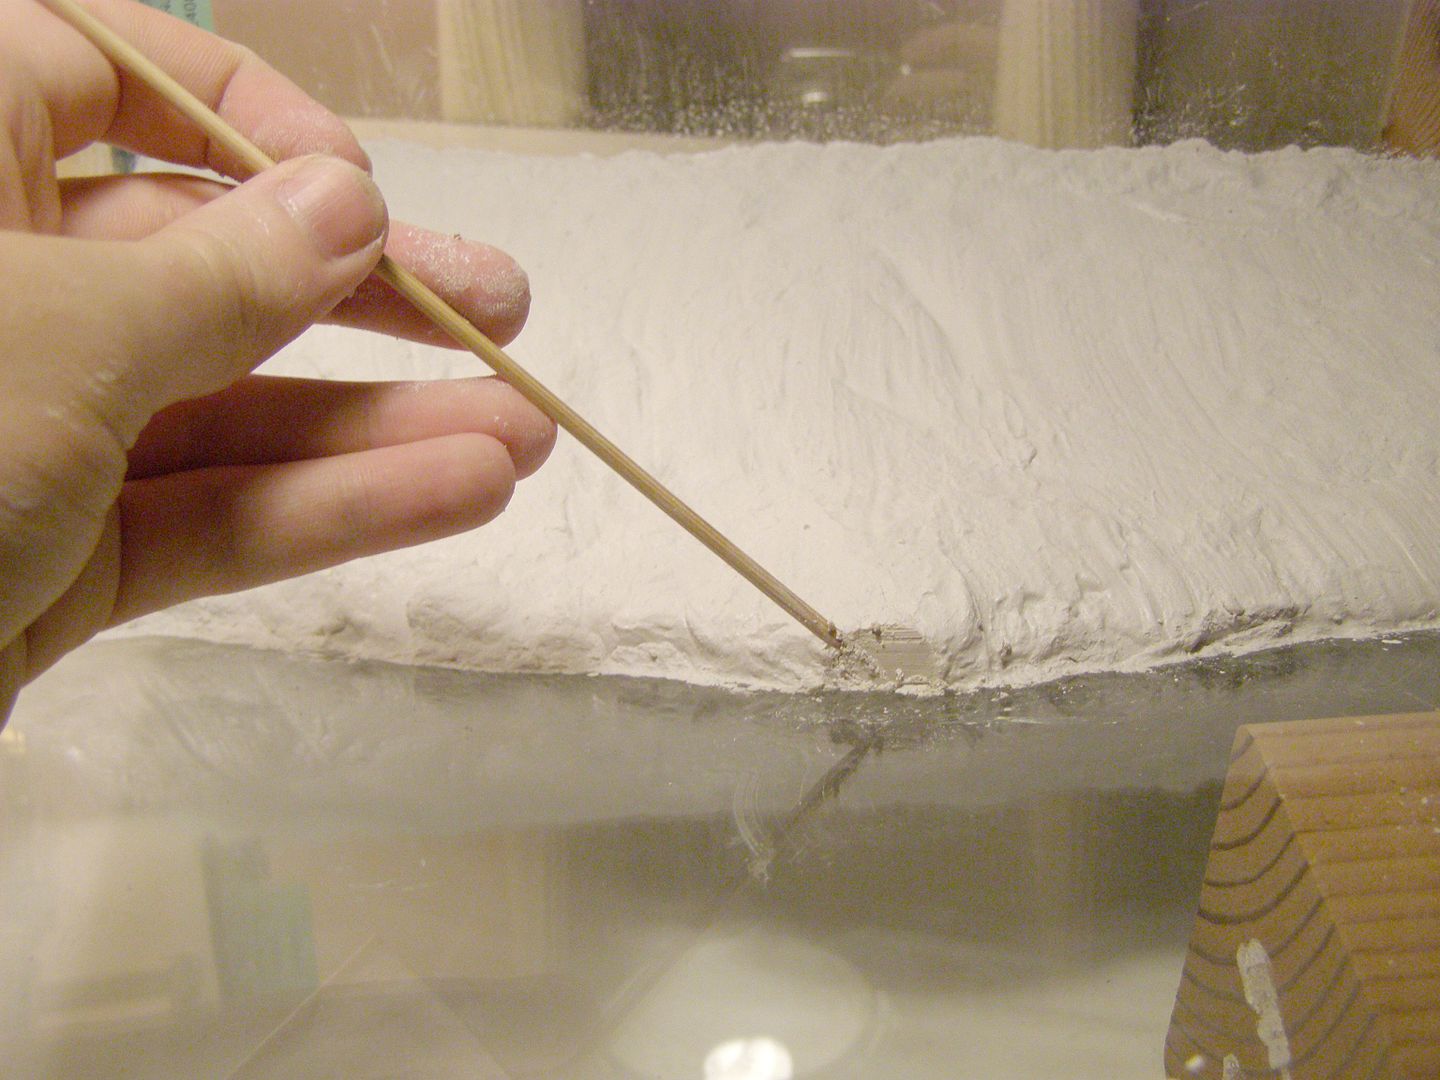
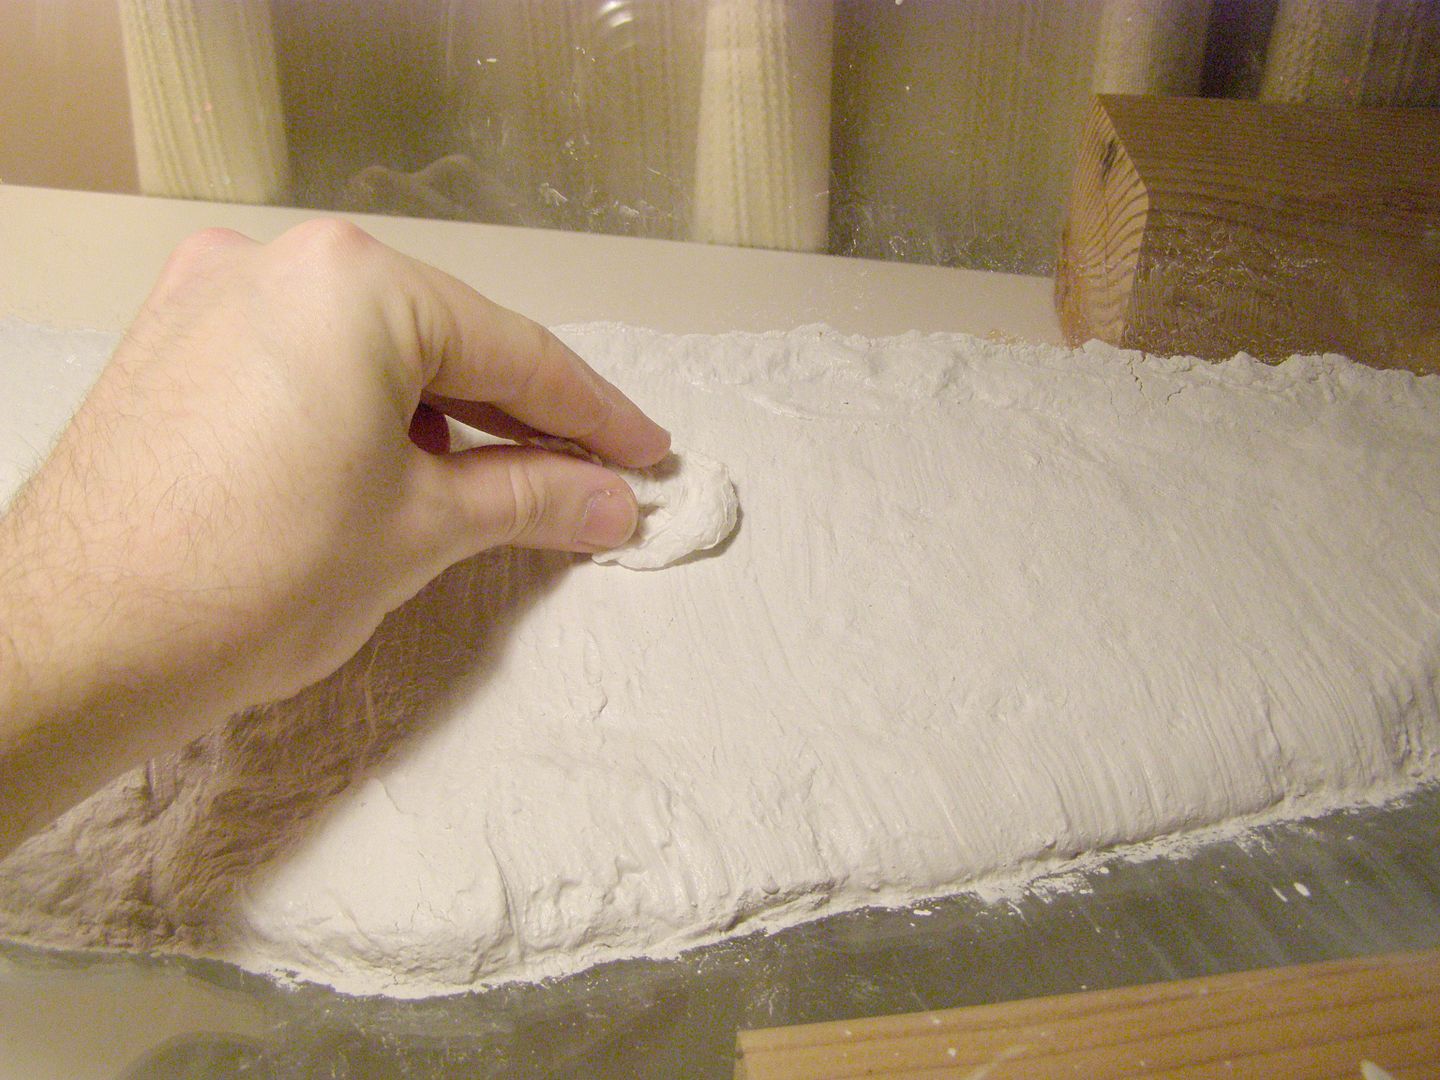
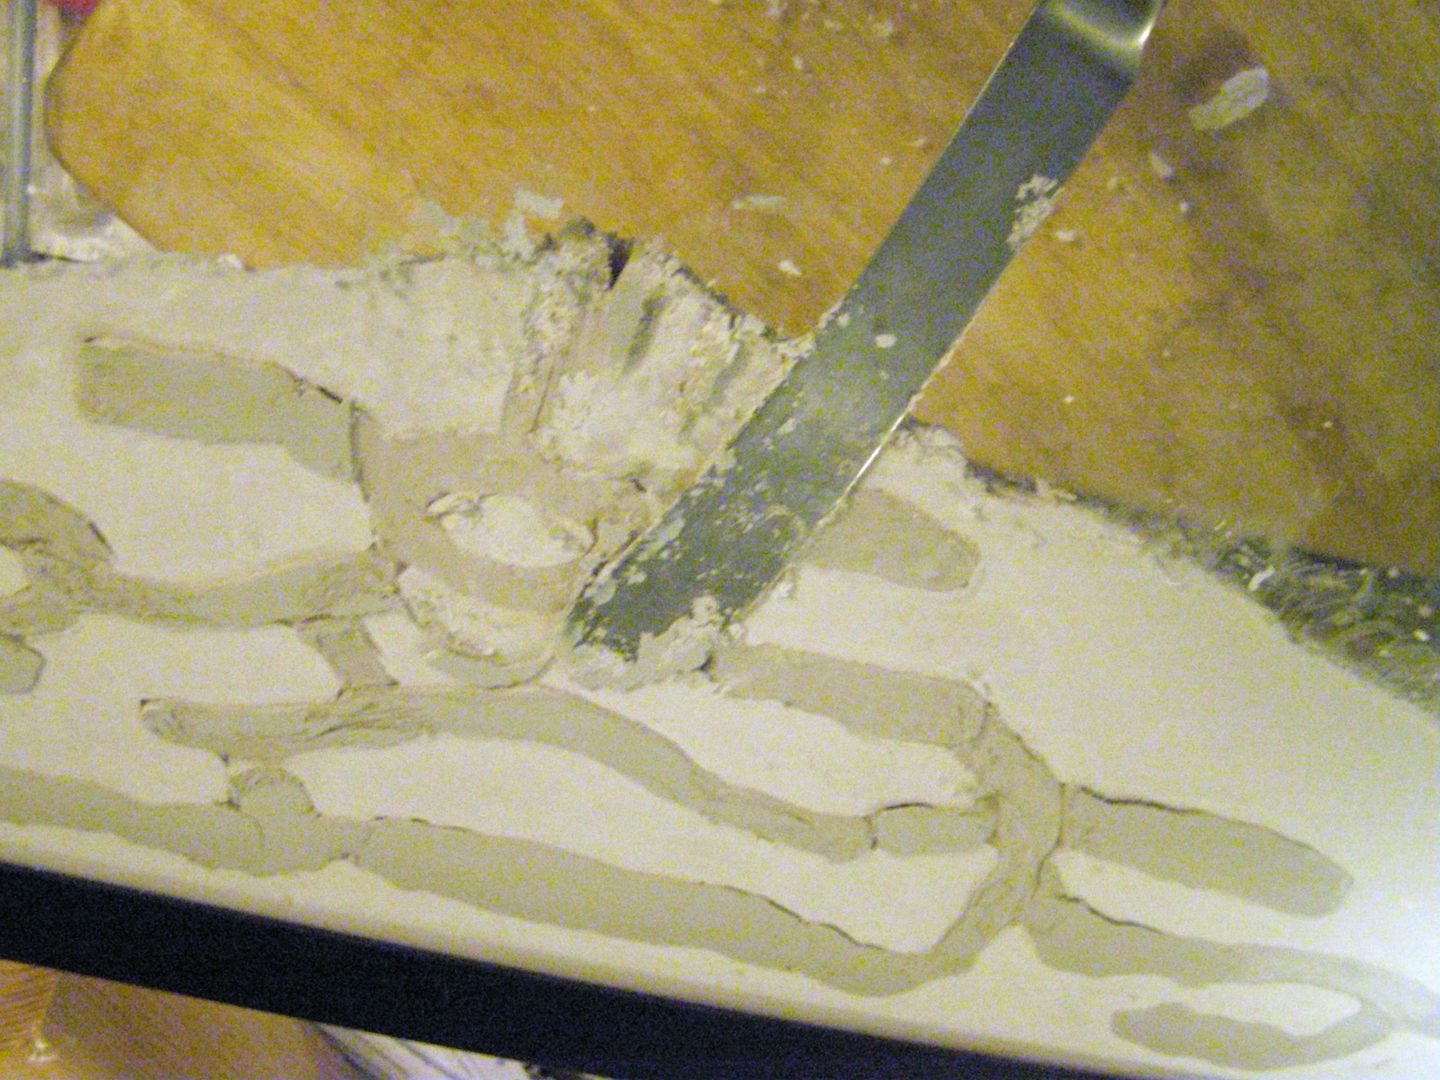
Before it hardens completely it's important to find the entrance(s). They are easily seen by looking under the setup. The pointed stick can be used to neatly scrape off a clean line.
Don't forget the other entrance if you made one.

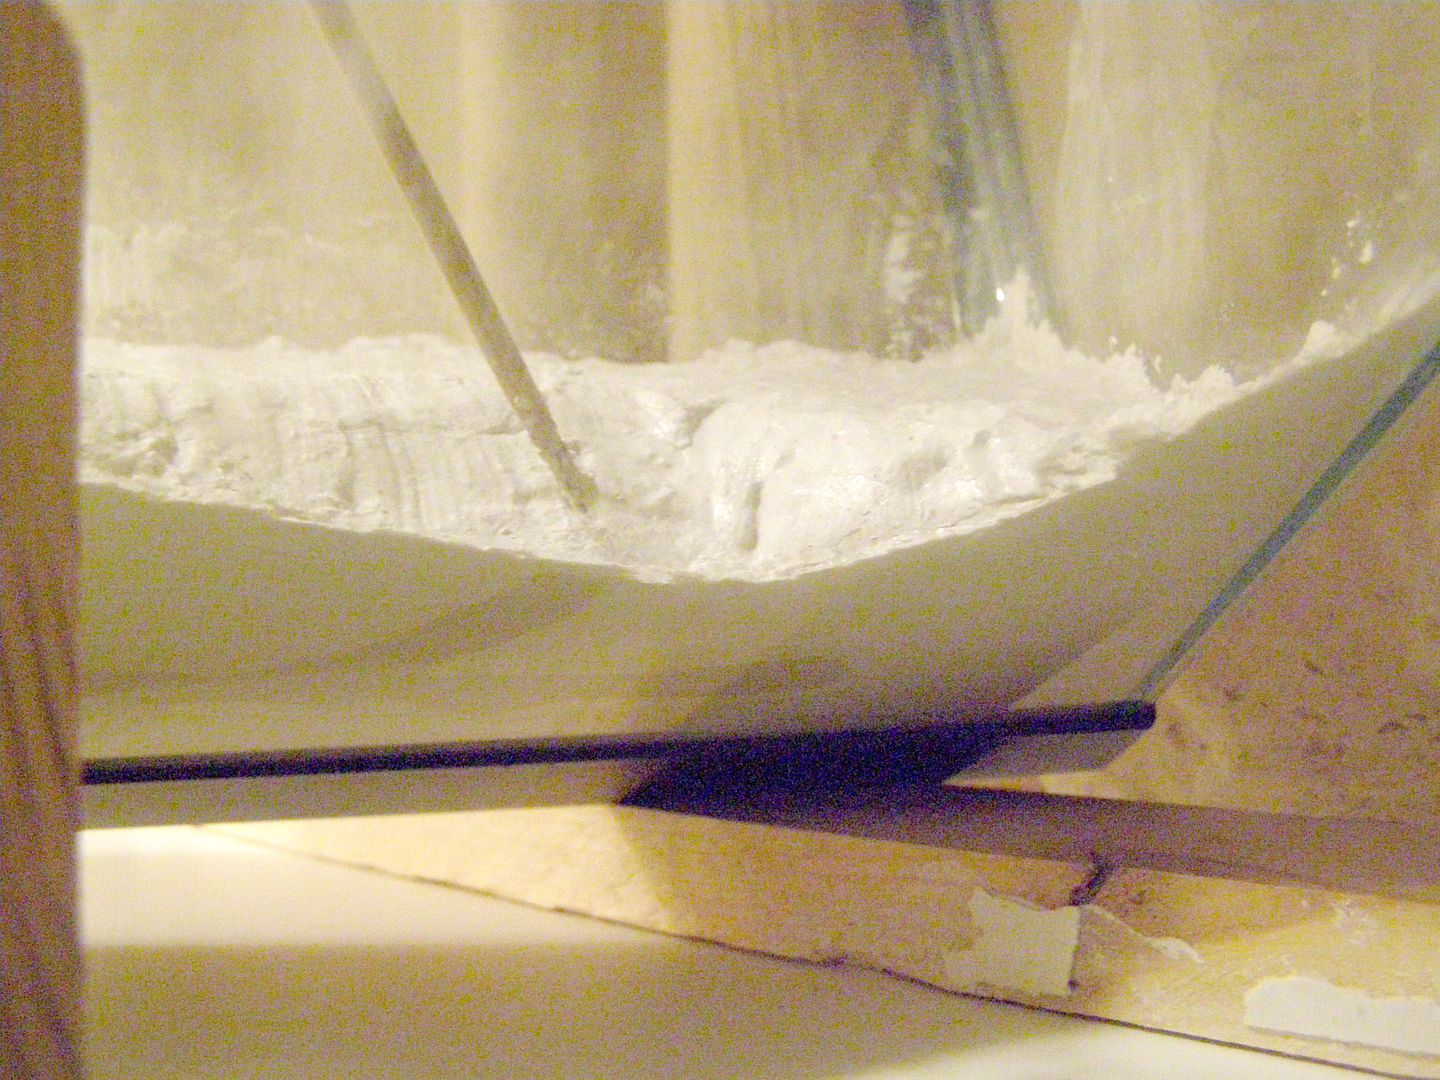
After 20 minutes of fine poking you should be reasonably pleased with the exterior look.
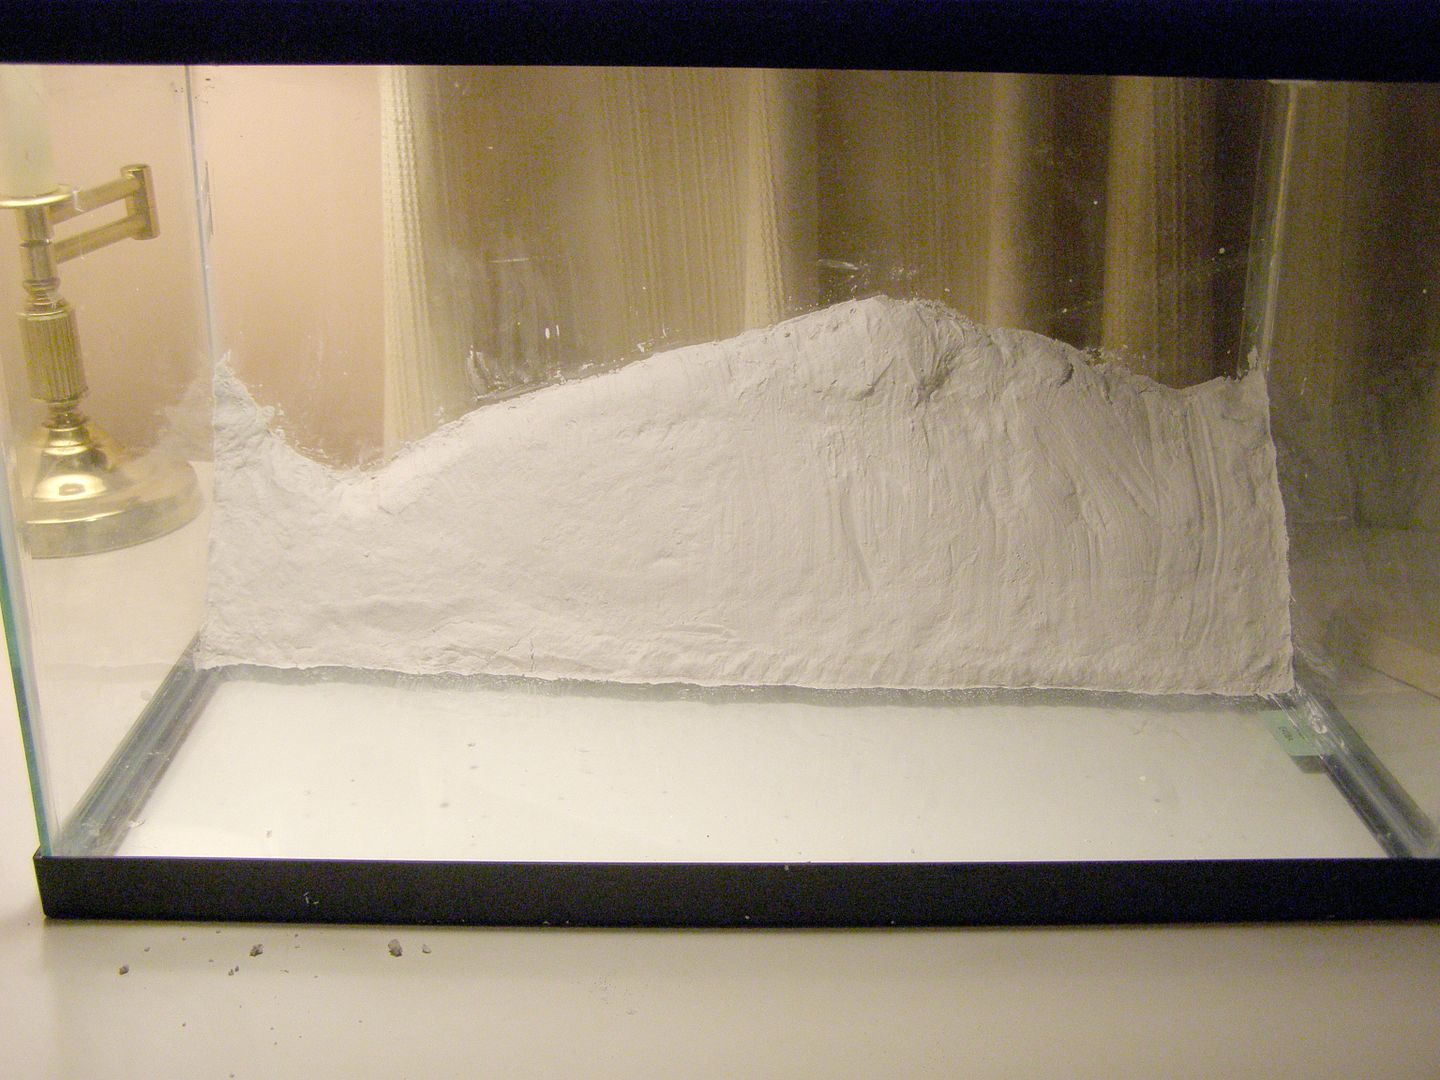
Allow another hour for it to get good and hard. This will reduce massive damage thanks to actions for the following step.

Now that it's ready we can continue. All that's really needed is to remove the clay. The trouble is we've made a setup that's perfectly flush with the sides of the glass. And even when the tank is turned completely upside down it won't budge. (I tried)
The easy solution would have been to put a wooden block to one side of the tunnels before we started pouring the plaster. After allowing it to set we could have simply removed the wooden block at this stage and had ample room to move the setup. The only thing holding it in place would be the clay on the glass, but that has to come out of there anyhow. The space the block of wood filled could later be filled in with more plaster.
I didn't do that so we're stuck using a thin piece of metal to pry it back. In this case I used two very odd looking long butter knives. It's not their proper name but they're a solid piece of metal, meaning the dull blade doesn't bend easily.
For the most part the plaster is a now a solid chunk of rock. But remember it's weakest at the edges. So you need to work the knife/piece of metal down several inches before attempting to pry it from the side. The Modeling Clay is still very soft so I suggest starting from the entrance(s) and working your way out from there.
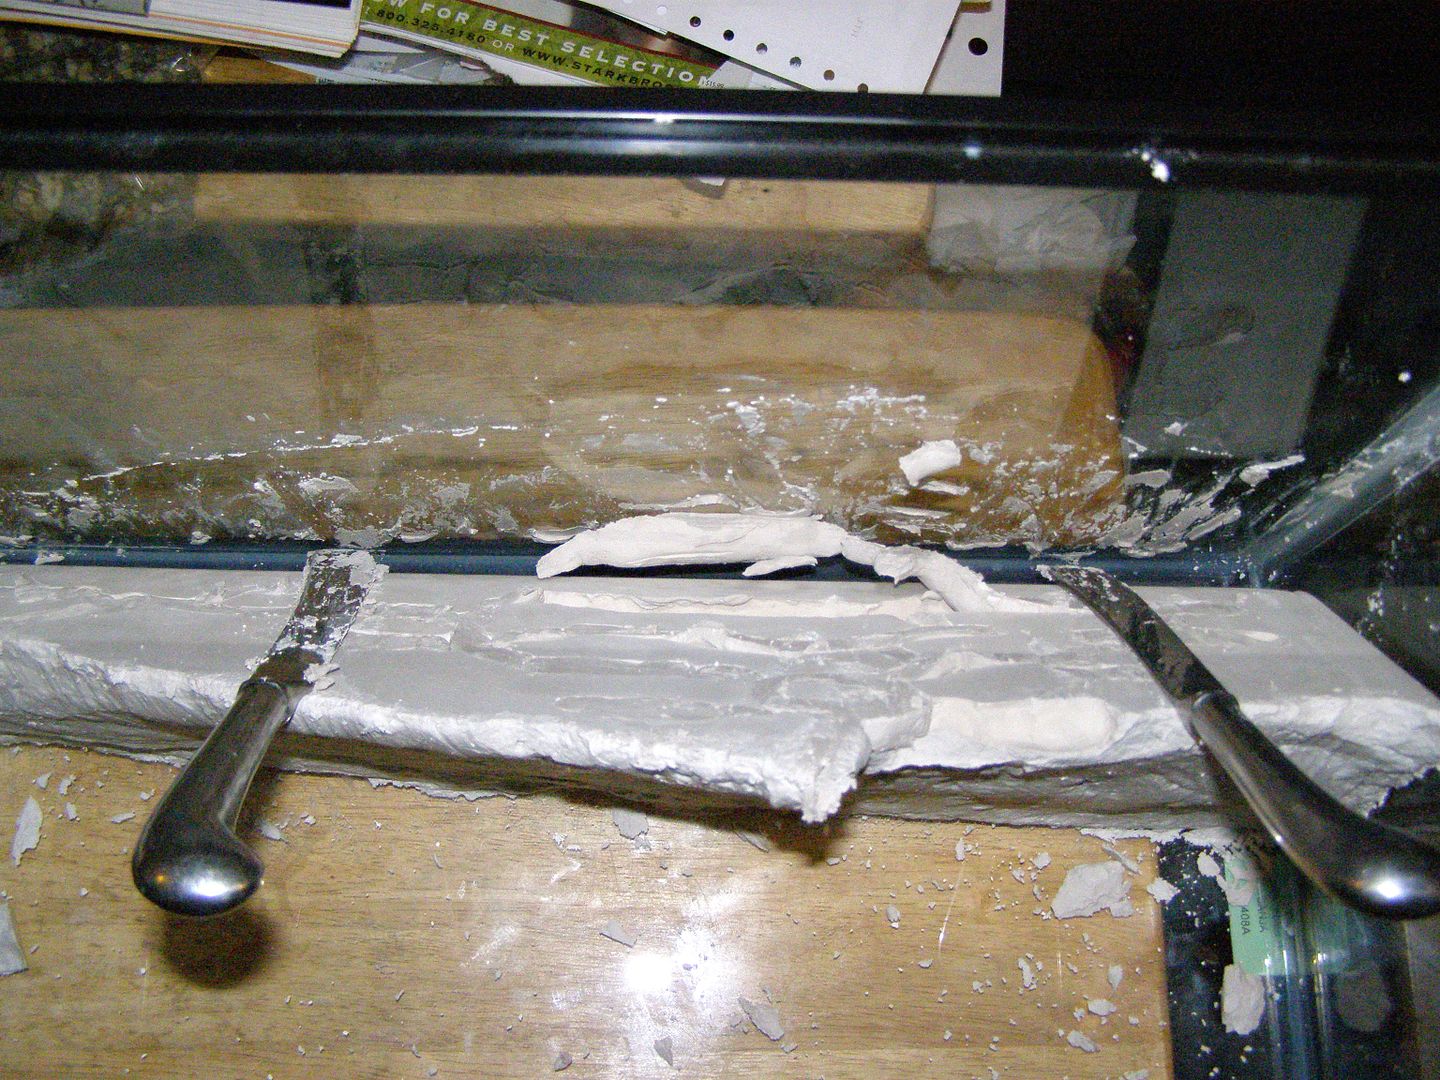
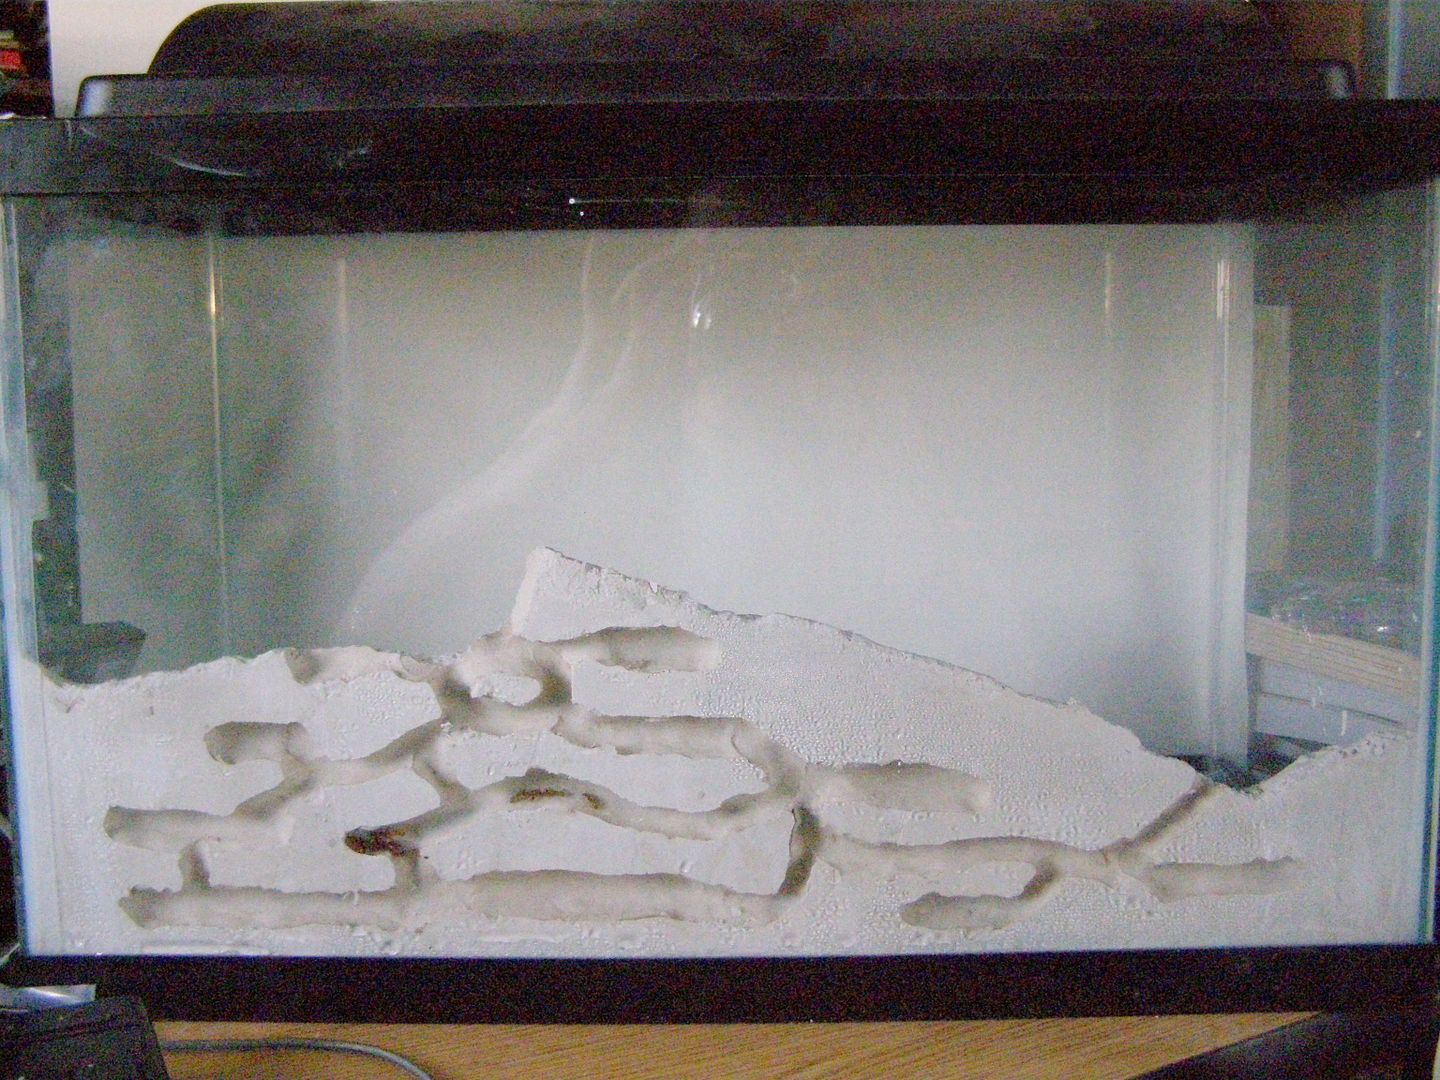
Success! It doesn't move so much as turn away from the glass. Also note that half the main entrance tunnel and the top of a room chipped off. A small price to pay in my opinion.

Remove the clay from the setup, and clean the glass as best you can. Modeling clay will dissolve when rubbed with a wet paper towel. You'll still need to go back and dry it up of course, but it cleans almost perfectly.
Notice that the setup is still viable inside the tank at this time. Because it was molded to be flush with the sides there's no way of getting it out of the tank. So leave it there for now.
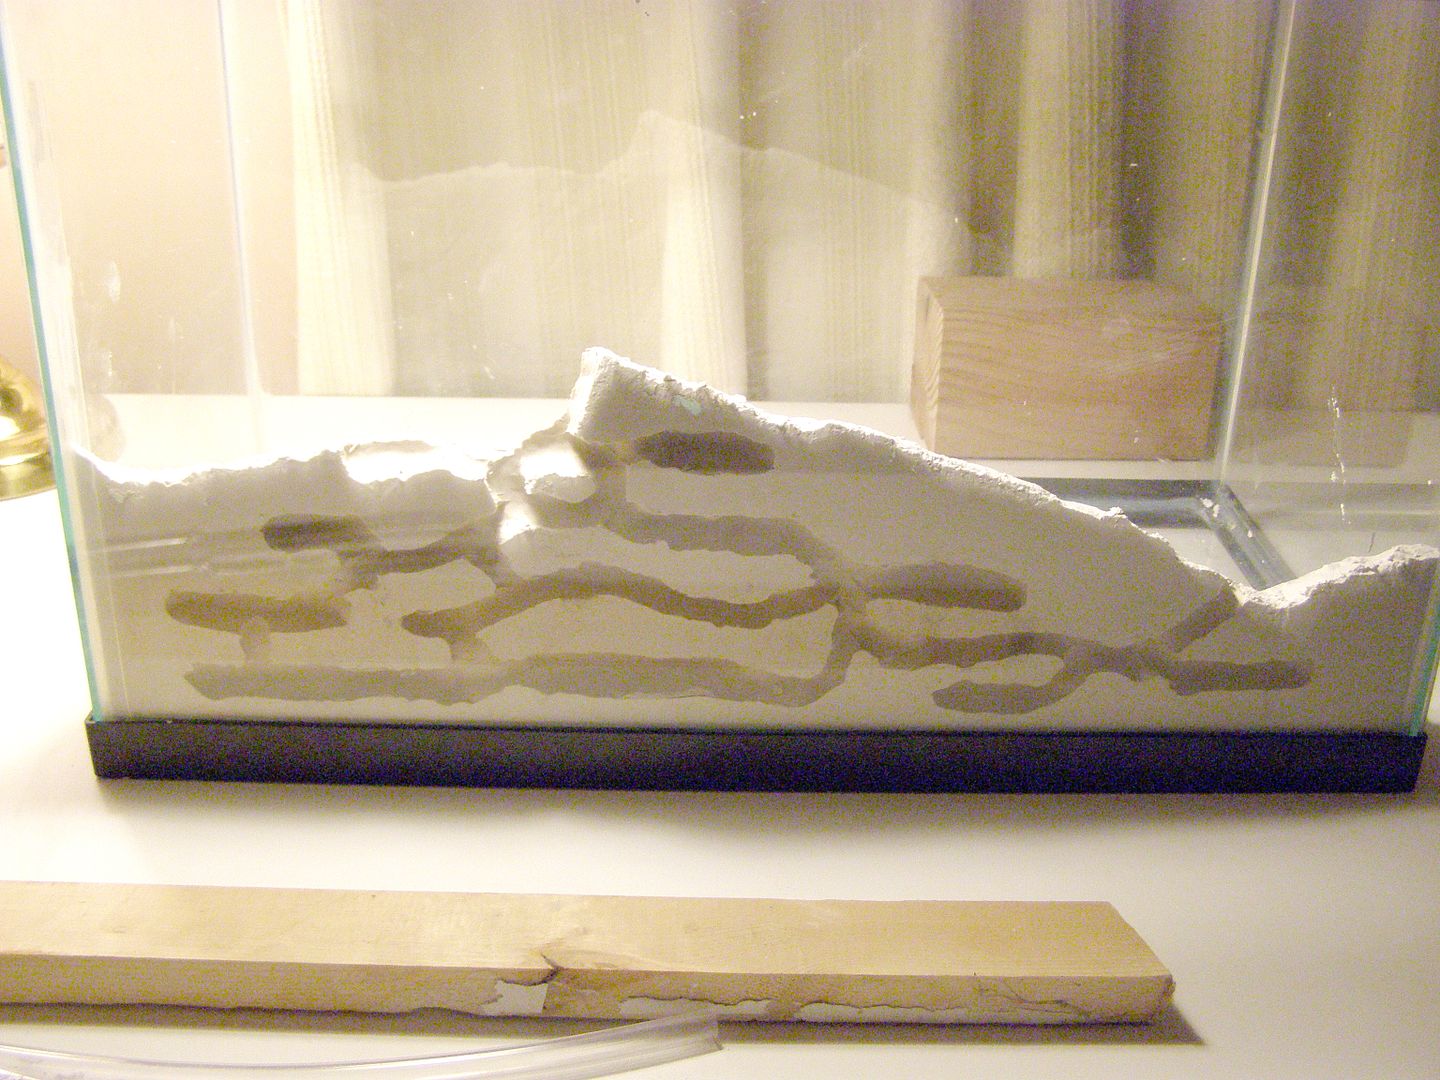
Now that everything is cleaned up you can see what we're left with. The damaged top room and entrance area is hardly noticeable.
I also used a small hand held dust vac to get pieces of plaster out of there but they could have been swept out easy enough.

I did attempt to fix it with some plaster but found this to be impossible. The wet plaster immediately dries when it touches the dry plaster. Rather than living with a cracked setup I simply threw the pieces away and moved on.
In the next post I will discuss adding ants.